
How to Airdrop Solana NFTs Using Metaplex and Gumdrop
Written by Daniel Idowu
This tutorial walks you through how to airdrop NFTs on Solana using Gumdrop, one of the NFT tools created by Metaplex. If you are new to developing NFT projects on Solana, this beginner-friendly tutorial is for you.
Estimated time to complete this guide: 15 minutes
In this tutorial, we will:
Create an NFT
Mint an NFT
Airdrop an NFT with the Gumdrop Command Line Interface (CLI)
Create a link to share with friends using Vervel and Gumdrop
And don’t worry if you don’t understand what these words mean yet! We’ll go through everything together.
What is an NFT airdrop?
An NFT airdrop is when a free NFT is transferred to a wallet address. NFT airdrops are popular ways for NFT projects to reward collectors, incentivize community engagement, or hand out allowlist tokens for upcoming NFT mints. NFT airdrops are most frequently employed as an NFT marketing tactic.
Some examples of NFT airdrops include:
Swim Protocol - airdropped a Swimmer NFT to people who used their cross-chain bridge
Aurory - airdrops new art and collectibles to collectors of their Aurorian NFTs
Degenerate Ape Academy - airdropped mint tokens to token holders to participate in the Degenerate Trash Panda mint
By essentially giving away a free item to its holders, NFT projects can continue to create value for their tokens and community.
What is Gumdrop?
Gumdrop is an NFT feature from Metaplex that allows creators to directly send users on an allowlist to a reclamation link by building the tree with off-chain handles and allowing users to redeem into any wallet. Gumdrop can also be used with Candy Machine, complete NFT airdrops, and distribute tokens.
Gumdrop makes NFT airdrops on Solana easy by simplifying the process of dropping our Non-fungible tokens using an allowlist.
How to Airdrop Solana NFTs with Gumdrop
To make sure you’re all set for this tutorial, you’ll need the following tools installed on your machine:
If you're new to Solana development, learn how to install Solana developer tools before moving forward.
You can utilize NVM, if you have a different version of Node installed on your machine.
If anything seems overwhelming right now, don't worry. Each tool's functionality will be demonstrated as we move on.
Step 1. Initialize Using the Gumdrop CLI
Installing and configuring the Gumdrop CLI is handled through the Gumdrop GitHub repository. They provide everything you need. Let’s clone the repository and get it onto our computer. We also need to confirm node, yarn, and ts-node are installed before proceeding.
You can install ts-node by running:
npm install -g ts-node
You can verify by running:
ts-node --version
Now, let’s create an empty folder with the mkdir command in your terminal. We will name this folder solana-airdrop.
Run the following command inside the folder to create a Solana wallet:
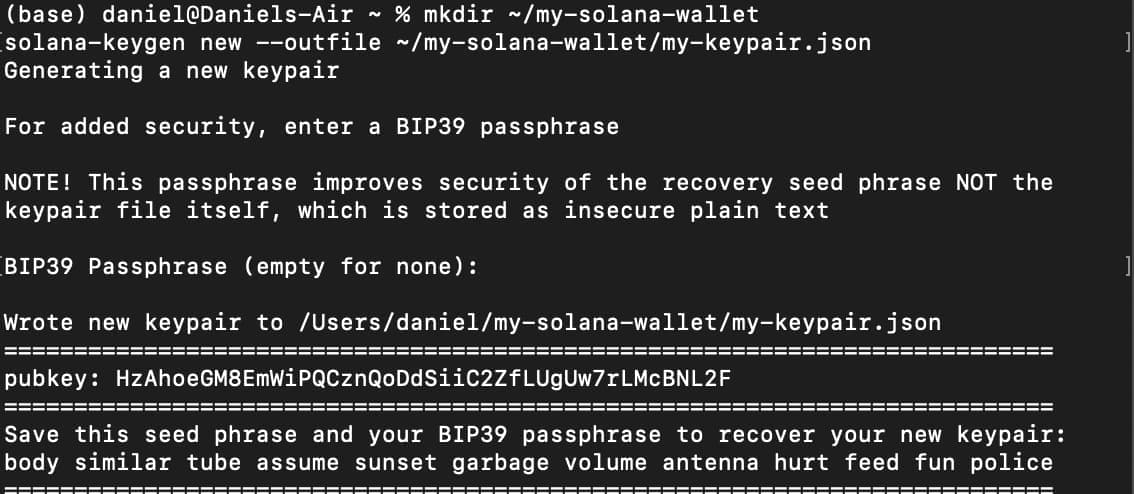
solana-keygen new --outfile ~/solana-airdrop/solana-devnet/keypair.json
The message you see in your terminal should be saved in a secure location because we'll need the pubkey and seed phrase later.
Here is an example of what that should look like:
Next, clone the Gumdrop project into the solana-airdrop folder:
git clone https://github.com/metaplex-foundation/gumdrop.git
Then we navigate to the directory containing the CLI:
cd packages/cli/src
Next, run:
yarn install
This command will install all the necessary dependencies. The installation process can take a few minutes.
Next, we're going to connect to the Solana Devnet cluster as we wouldn't like to spend any money for learning purposes. Mark that for real-world applications, we'd need to use the mainnet. You change it to devnet by running the command below:
solana config set -url https://api.devnet.solana.com
Now, we need to create a new key that would hold our NFT. The "Se" basically means that our pubkey starts with “Se”
solana-keygen grind --starts-with Se:1

Let's run a couple more commands to configure our new Solana address:
solana config set --keypair Se93wChXsXBzeWjEXrhufRAHJE6sP6dMaS7aCsvneDU
This should display the following:

Step 2. Fund your Devnet Wallet
Now we need to get test Solana tokens. Since we're in the devnet, you can quickly get some sol by running the command below in the terminal:
solana airdrop 5
Alternatively, you can grab some devnet SOL tokens from a Solana faucet.
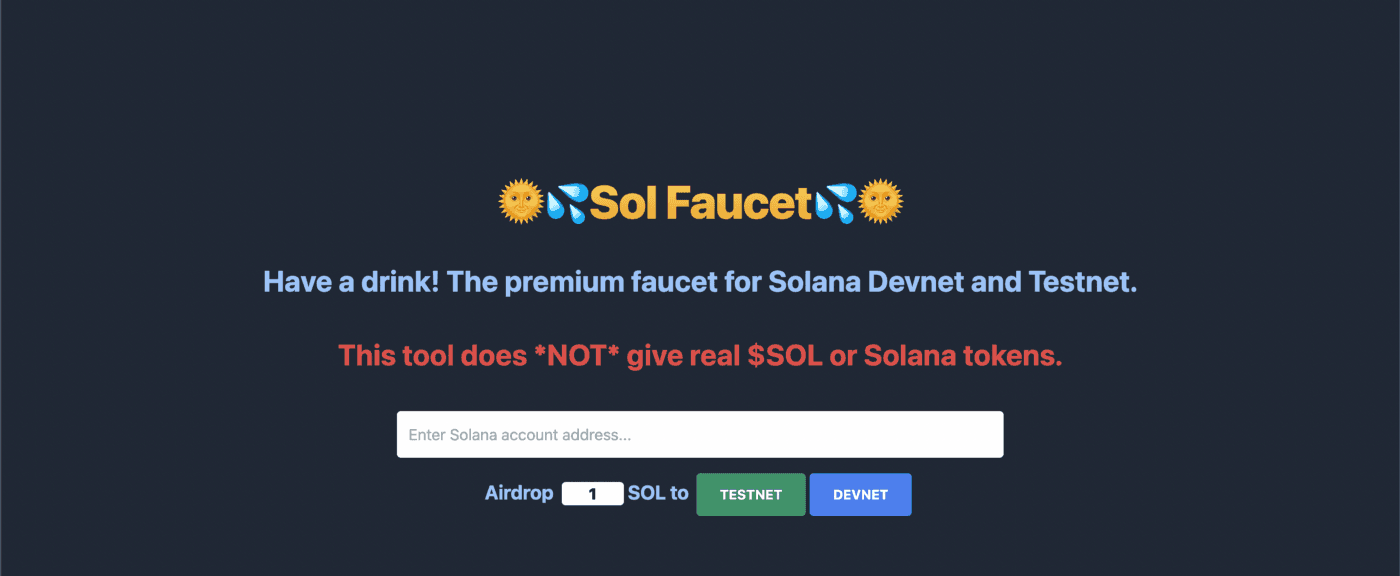
You can confirm you have Solana in your devnet wallet by running this script in the command line:
solana balance
Step 3: Connect Phantom Wallet to the Devnet Cluster
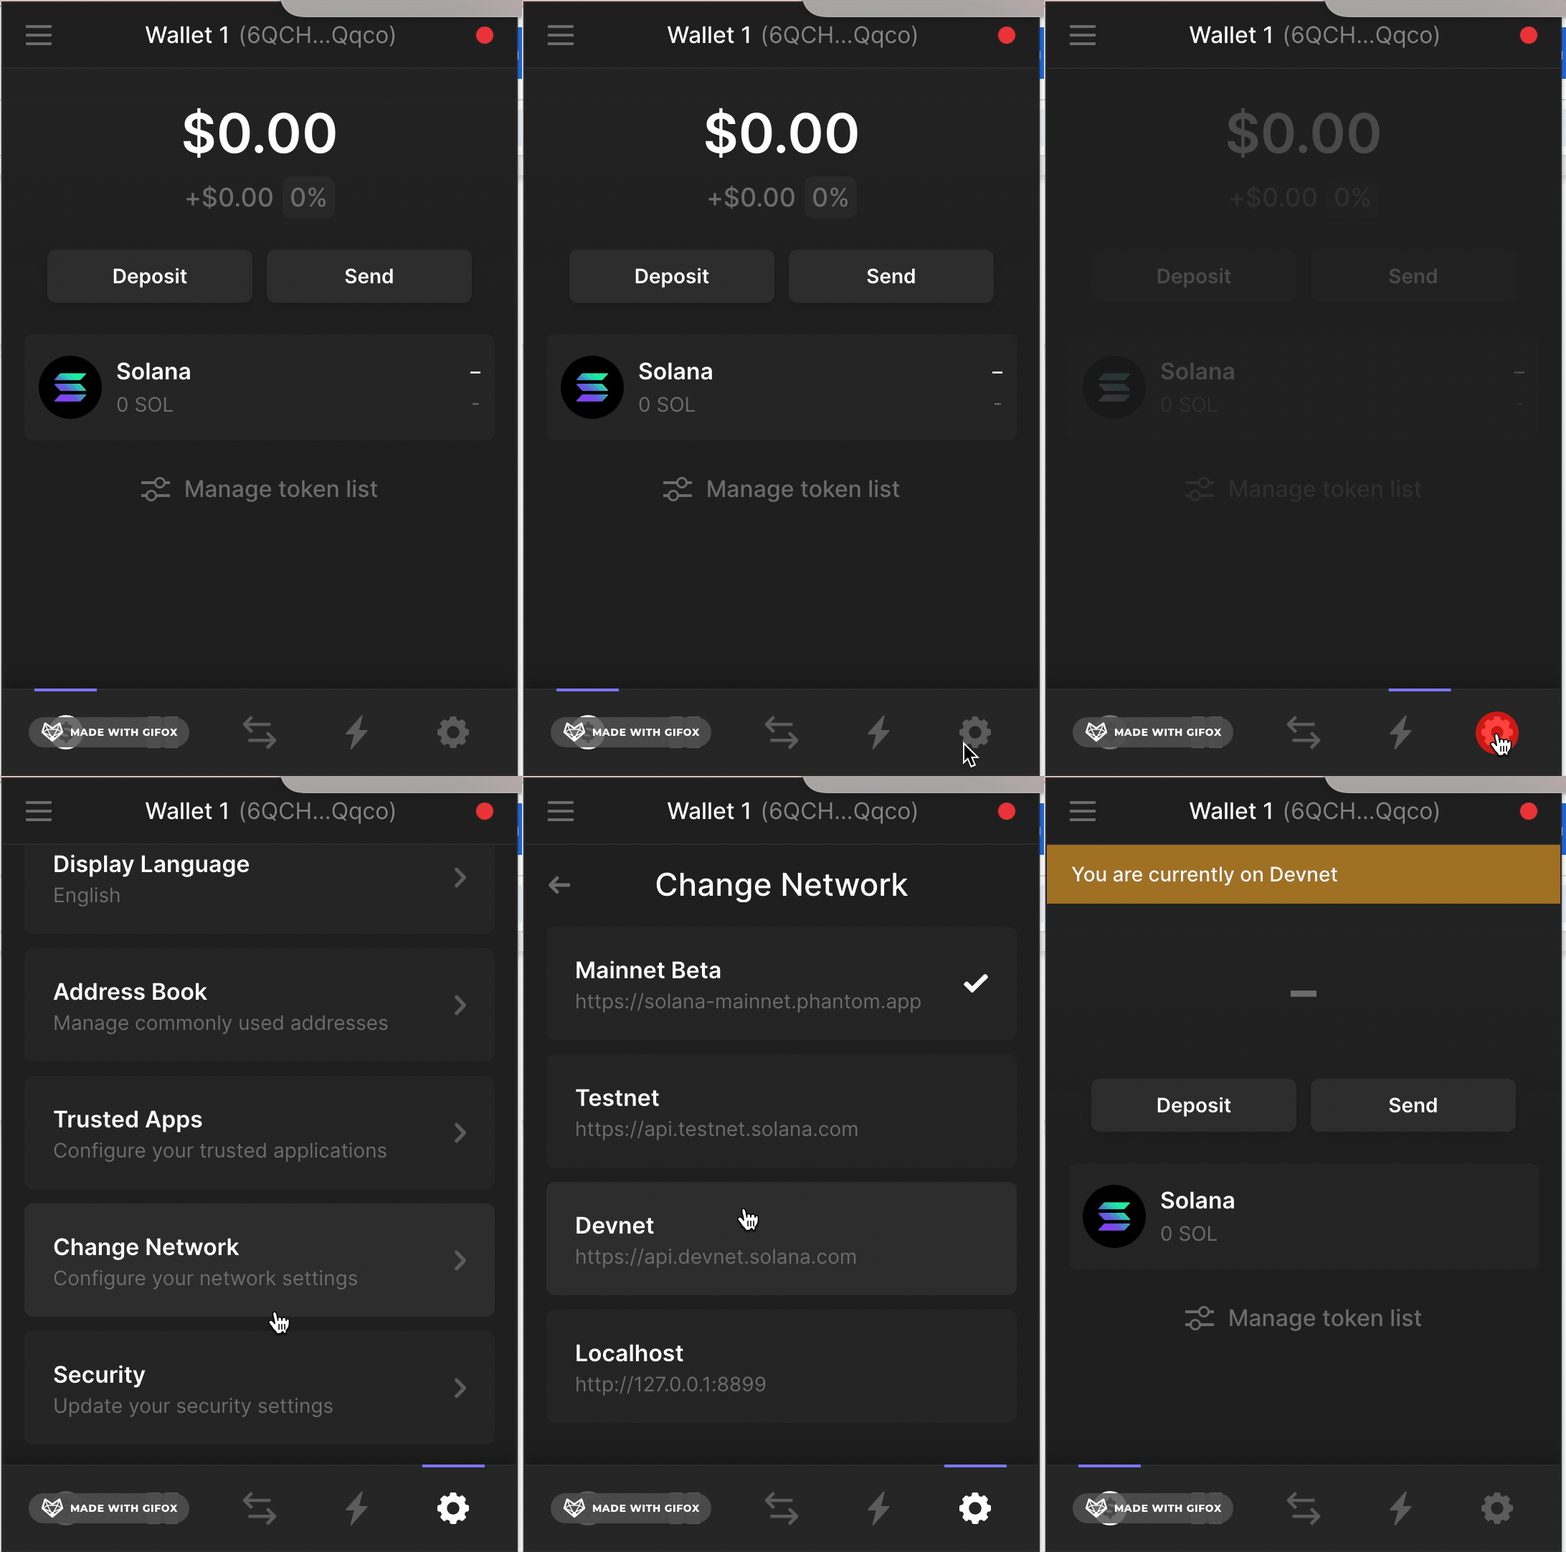
Now, we will link the newly formed devnet wallet to Phantom. To do this, click settings, select Change Network, and then choose Devnet.
Step 4. Add a Devnet Wallet to Phantom
We must now acquire the private key for the devnet wallet. Open your terminal and use cat to inspect the keypair.json file's contents to get that:
cat .config/solana/devnet.json
To add the devnet wallet to Phantom:
Open Phantom
Copy the output you just received
Give it a suitable name
Select Import Private Key from the top left navigation menu
Click Add/Connect Wallet
Paste the key into the Private Key area
Now, your Devnet Phantom Wallet should reflect 5 SOL.
Step 5. Create an NFT
You can use platforms like Metaplex, Holaplex, or Solsea that follow the metadata standard for creating and minting your Solana NFT.
Here's what to do first:
Set up your wallet and ensure it has some SOL tokens
Visit the Holaplex website
Connect your Phantom wallet to the Metaplex platform
Metaplex will ask for permission to view your funds, and request approval for transactions. You can approve this.
Next:
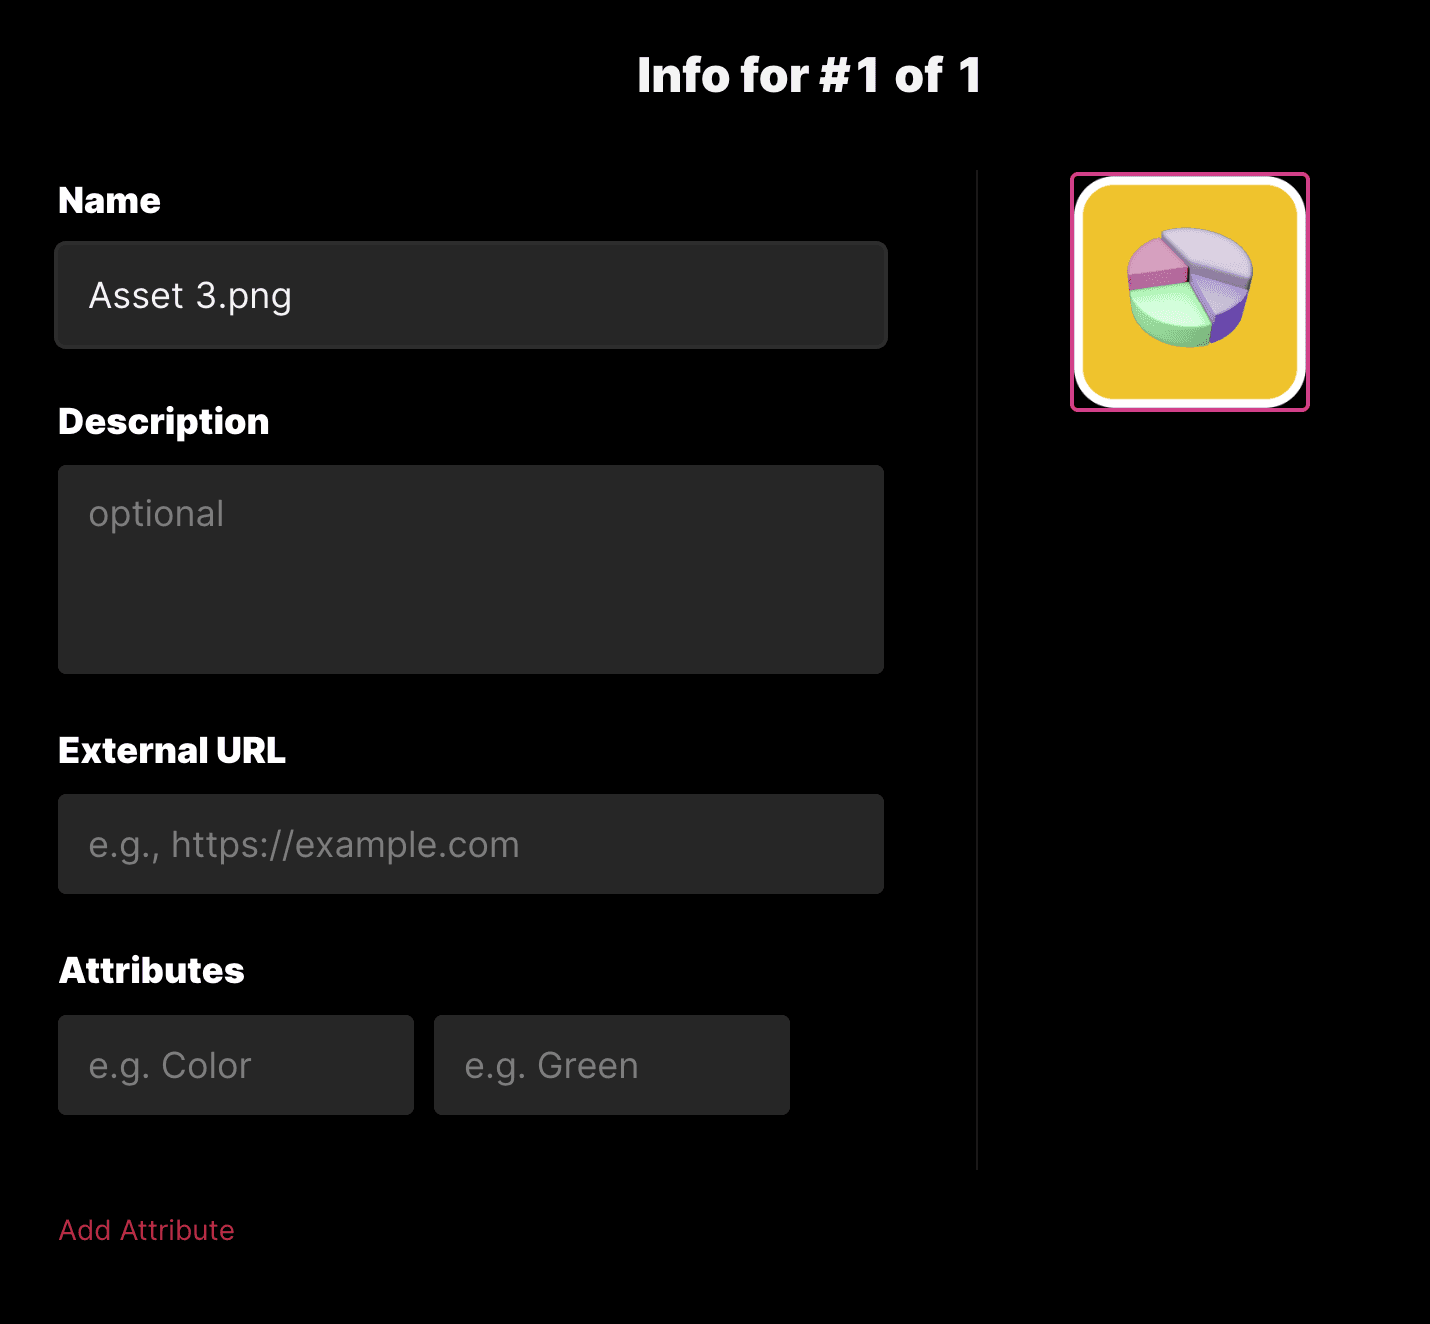
Click the create tab
Select browse file
Upload any image of your choice
Add a Name and description to your Image
Give some attributes
Click Next
We set our NFT to unlimited to allow us to create as many copies as we wish to mint.
We should now be able to see the NFT in your wallet after clicking mint and it being successful.
Now, get the metadata and store it in a secure file, and transfer the NFT from your Phantom wallet to the pubkey address you generated earlier.
You can query that by running:
solana-keygen pubkey my-keypair.json
Alternatively, more advanced Solana developers can mint with Candy Machine.
Step 6. Select Your Drop Type
Before you move on, you must understand that the gumdrop program supports three drop types:
The Token Airdrop
NFT candy machine pre-sale
The Edition prints
We must also define our distribution method and whitelist:
ts-node gumdrop-cli.ts
A list of options guiding us on how to use the CLI is listed here:
ts-node src/gumdrop-cli.ts help create
For the drop type, we will be going with Token Airdrop.
This method allows the CLI to move the tokens to the generated disposable keypair, enabling a more logical creation of additional gumdrops.
--claim-integration transfer
-transfer mint -k
For the distribution method, we can airdrop using SMS, Discord, Email, or wallets. For this tutorial, we airdropped via wallets using the command below:
--distribution-method wallets
Before moving on to run the full command, we have to create a whitelist.json file. The allowlist will help specify the recipients of the Airdrop.
It is a list containing the receivers with identifying values such as mints or prints to be claimed and the number of editions.
The whitelist is in this format below:
[
   {
  "handle": "2tYbLBHmpsEbf6hn8woKFeXQxQK8qZ9ZhnU5pXAx6WhU",
  "amount": 1
    },
 {
  "handle": "2tYbLBHmpsEbf6hn8woKFeXQxQK8qZ9ZhnU5pXAx6WhU",
  "amount":1
    }
]
You can replace it with the information below and populate it based on the number of friends that will receive the NFT airdrop.
We can then reference the distribution list with the following command:
--distribution-list whitelist.json
Finally, run all the commands below:
ts-node gumdrop-cli.ts create \
-transfer mint of mint > -k of nft> \
--claim-integration transfer \
--distribution-method wallets \
--distribution-list whitelist.json
Step 7. Airdrop the Solana NFT
Now, let's airdrop the NFTs to the address of your choice. In the file directory, locate the “log” folder, check all of the files, and look for the .json file containing URLs as shown below. The file contains the content of the whitelist.json file with URLs meant for the recipient of the airdrop. You can follow that link in your browser.
You should have something like this:
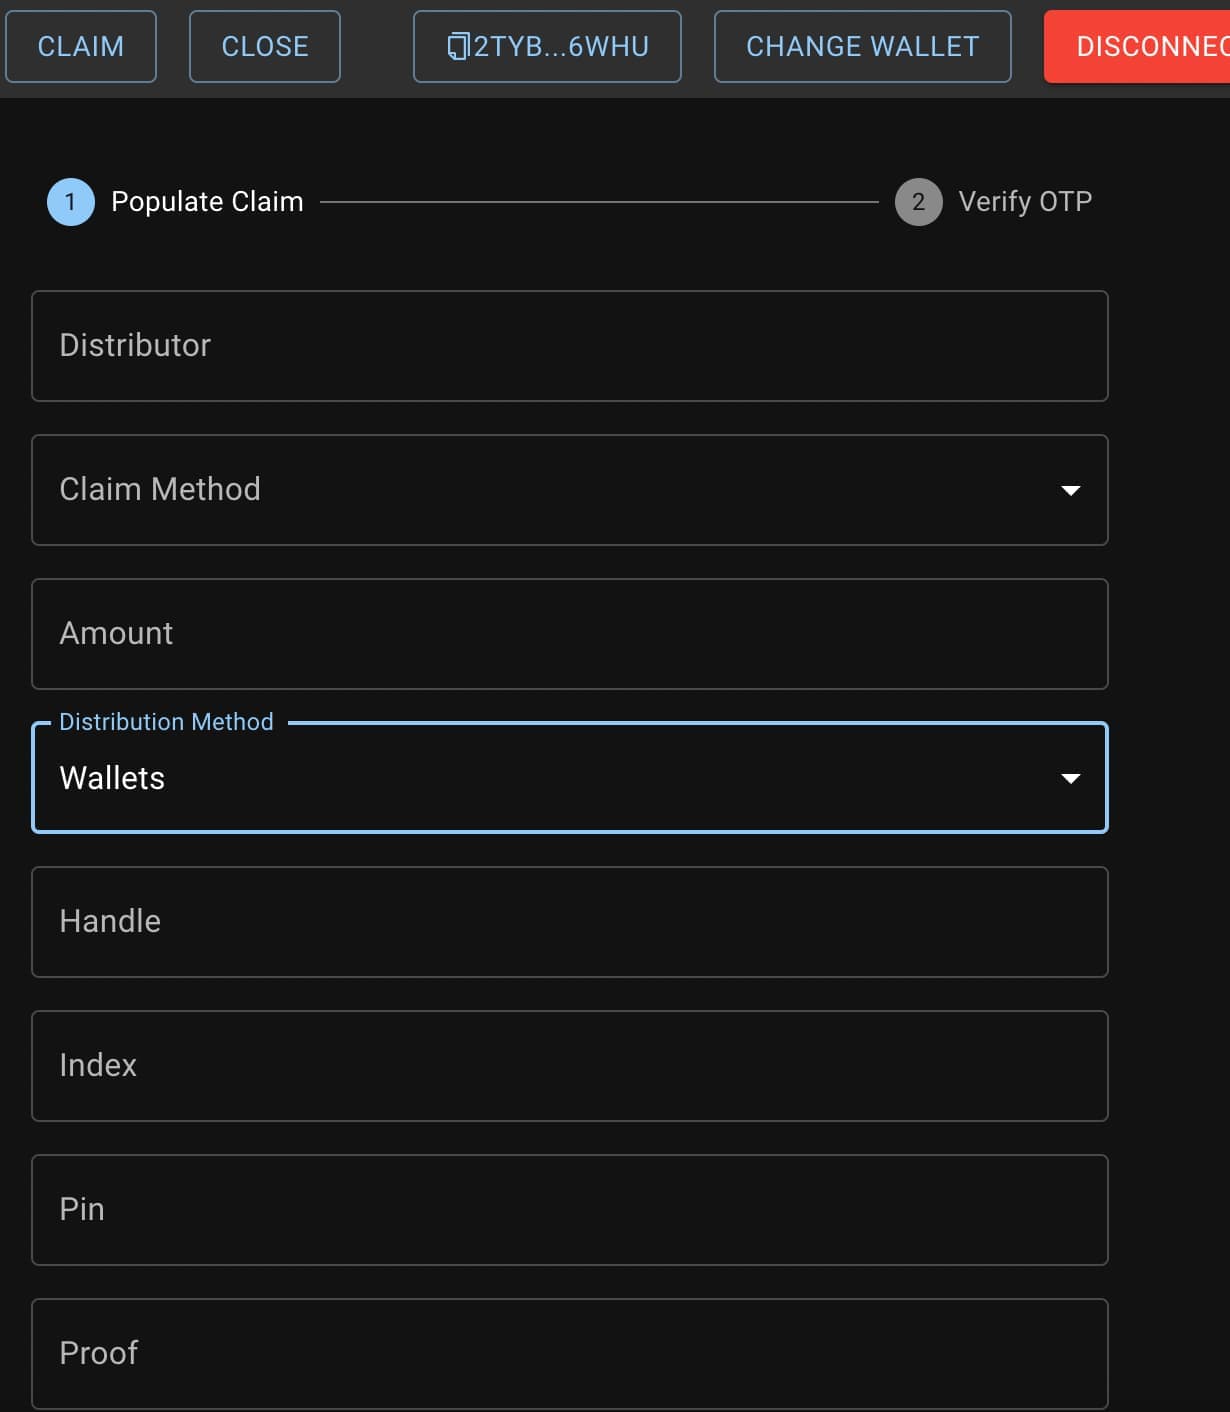
Gumdrop provides an interactive UI that makes it easy for recipients to claim their airdrop. We can deploy this custom gumdrop site to Vercel.
And that's it! You have built a gumdrop site that can airdrop NFTs to friends.
Step 8: Close a Gumdrop
When the gumdrop is finished, the master edition can be recovered by closing the gumdrop. If you close the gumdrop, the recipients might be unable to claim their gumdrop.
The code snippet to close a gumdrop is:
ts-node gumdrop-cli.ts close \ --base \ --keypair \ --claim-integration \ --
To withdraw authority or return tokens, you can pass further information about the claim integration.
Step 9: Deploy a Custom Gumdrop Site
You can choose to deploy your Gumdrop website. I would recommend Vercel, which is known to provide a robust developer experience, especially when building frontend frameworks and static websites.
First, head over to Vercel and sign-up for a free account, and use GitHub for faster integration.

Here's what to do next:
Select new project and import the file from your Github repository
Fill in the Project name and define the directory
Toggle the Build and Output Settings and make changes as shown below
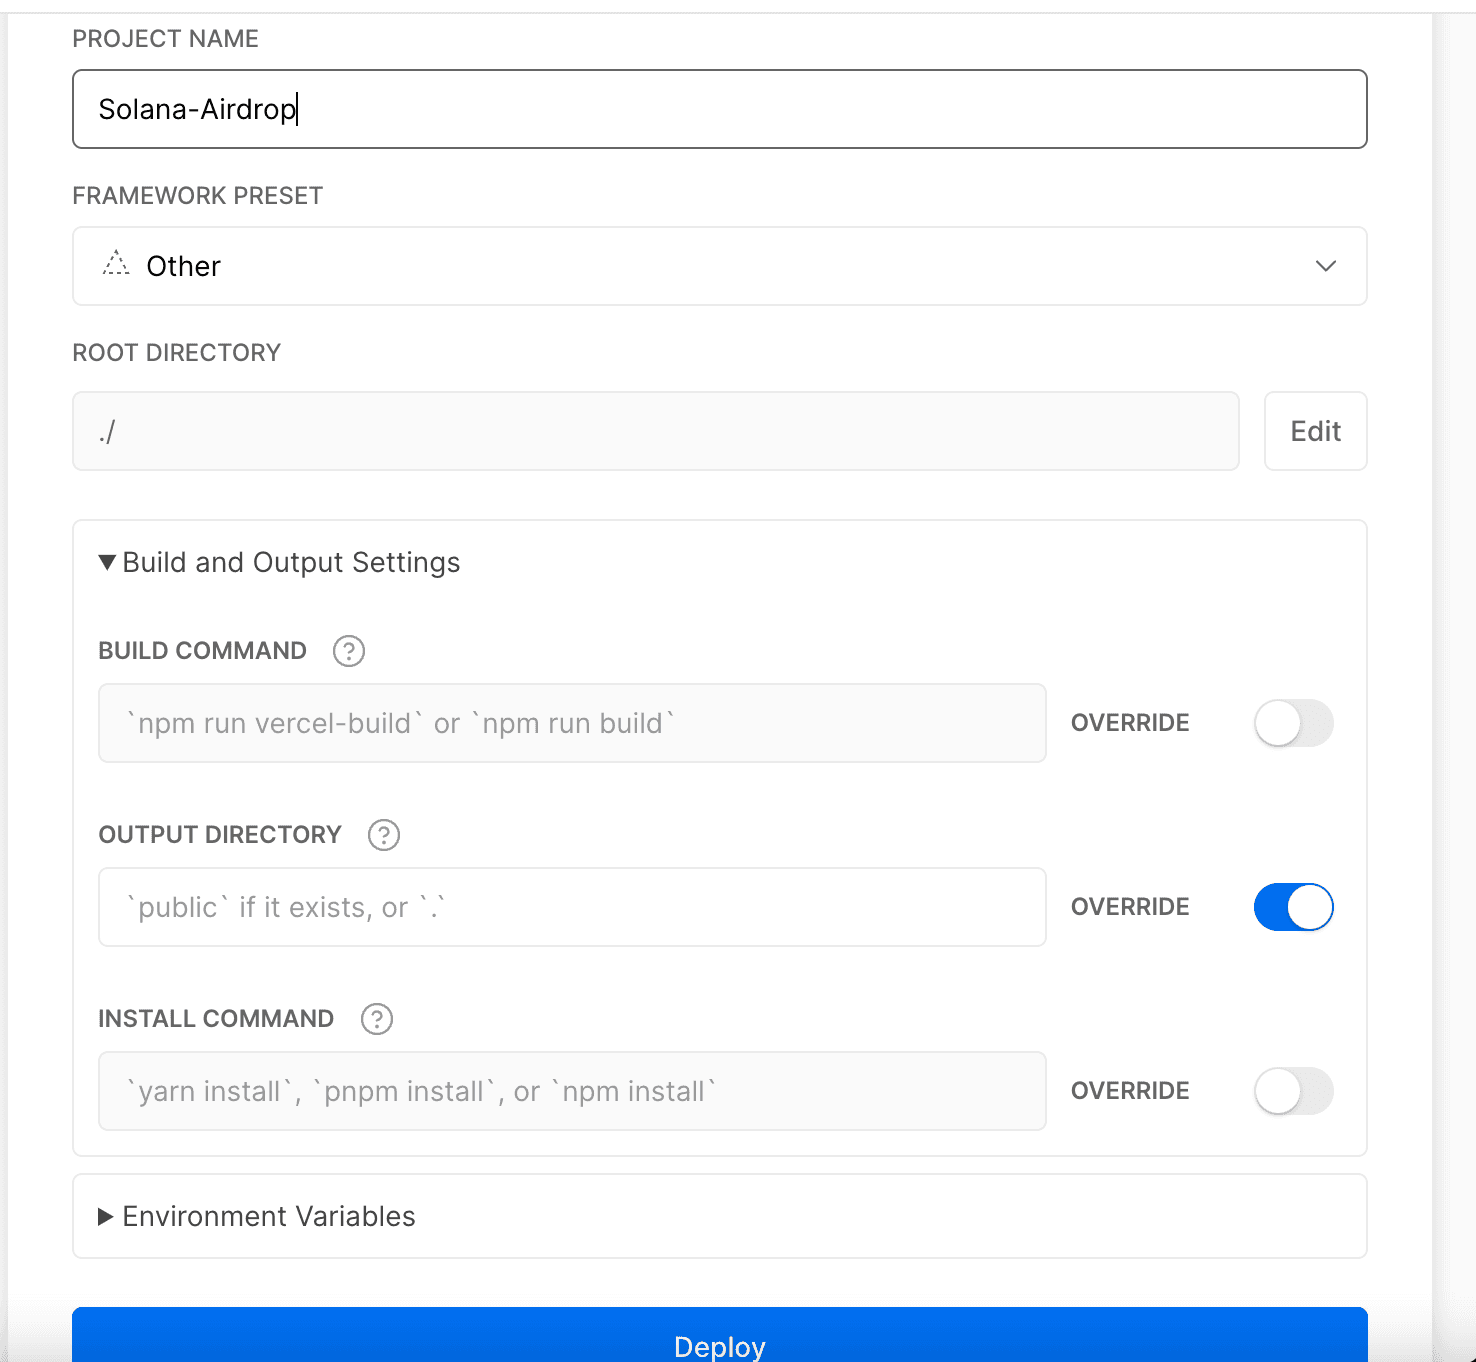
Now, confirm that the Output Directory is set to override, and click Deploy to get a unique link for the project!
Congratulations! You just deployed a Custom Gumdrop website 🎉
If you'd like to share with your friends, you can simply share the link. You should also retrieve their wallet addresses as the allowlist distribution method is set to wallet.

Related overviews
A deep dive into the architecture that powers Solana and why it matters for devs.
Compare 13 top Solana wallets 2025. Secure SOL storage for DeFi, NFTs & staking. Hardware, mobile & browser.
Explore the best Solana RPC node providers on the market.

Build blockchain magic
Alchemy combines the most powerful web3 developer products and tools with resources, community and legendary support.